Moog Music, ever the purveyors of analog excellence, turn their attention to the digital realm with the Diffusion Delay on the Muse synthesizer. In this official demo, the Moog team walk us through how this effect—modelled after classic rack delays—adds dimension and movement to Muse’s analog voices. From independent stereo controls to clever filtering in the feedback path, the video explores how the Diffusion Delay can transform a simple patch into a lively, evolving soundscape. For those who like their delays with character and control, this is a deep dive worth patching into.
2. August 2024
MILES
Moog Music’s Muse Diffusion Delay: Spatial Tricks and Sonic Texture in Focus
Diffusion Delay: A New Dimension for Muse
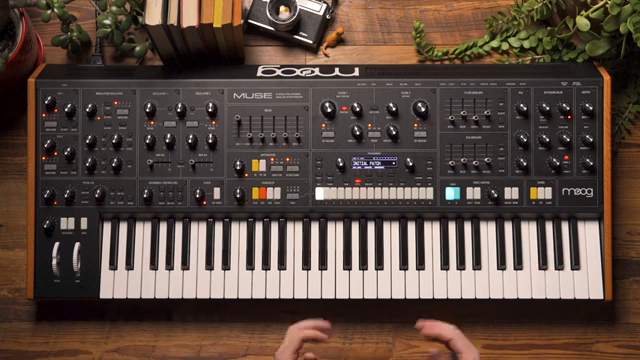
Moog Music’s Diffusion Delay is introduced as a digital effect designed specifically for the Muse synthesizer, with its roots in classic rack processors from the late ’70s and early ’80s. The video makes it clear that this isn’t just a generic delay—Moog have tailored its response to complement the Muse’s analog voices, aiming for a pairing that feels both vintage and purpose-built. The result is an effect that’s intended to add space and depth to even the most basic of patches.
To demonstrate, the presenter starts with an initialized patch: a single sawtooth oscillator, no filtering, and a snappy VCA envelope for clarity. By routing timbre A into the Diffusion Delay, we hear a straightforward digital delay, but the real magic lies in how this effect can be shaped and manipulated. The video notes that users have the flexibility to assign either or both timbres to the delay, or bypass it entirely for a pure analog path—useful for those who want to keep things unadulterated.
"The diffusion delay is a great way to add some dimension and space to the sounds that you design on Muse."
© Screenshot/Quote: Moogsynthesizers (YouTube)
Independent Stereo Control: Crafting Movement
"We get this nice effect where the delay is jumping around in stereo and while it sounds like a proper ping pong delay it's just two independent delay times in stereo."
© Screenshot/Quote: Moogsynthesizers (YouTube)
A standout feature of the Diffusion Delay is its independent left and right time controls, which allow for creative stereo effects. By setting different delay times for each channel, the sound begins to bounce across the stereo field, creating a lively sense of movement. The presenter demonstrates this by adjusting the left delay to be slower than the right, resulting in a rhythmic, ping-pong-like effect—though, as noted, this isn’t a true ping pong delay but rather two delays running in parallel.
While a dedicated ping pong mode exists in the deeper menus, the video focuses on what can be achieved with the panel controls alone. This approach highlights the immediacy and hands-on nature of the Muse’s interface, encouraging users to experiment with stereo placement and rhythmic interplay directly from the front panel. The result is a delay that feels as much an instrument as an effect.
Linked Delays and Clock Sync: Timing with Precision
For those who crave tighter rhythmic control, the Diffusion Delay offers two key features: Link Delays and Clock Sync. Engaging the Link Delays button means the right delay time knob sets the base delay for both channels, while the left knob adjusts their spacing. This makes it easy to maintain precise relationships between the two channels, whether for subtle stereo widening or tightly locked rhythmic patterns.
Clock Sync takes things further by snapping both delays to divisions of the Muse’s master clock, whether internal or external. As delay times are adjusted, they jump between musical subdivisions, ensuring everything stays in time with your sequence or performance. Notably, Moog have implemented a cross-fading mode to avoid pitch artifacts when changing delay times—so you won’t hear the classic BBD warble unless you dig into the deeper menu settings. This keeps things clean and musical, ideal for modern workflows.
"Engage clock sync and what that's going to do is force both of the delays to snap to the nearest musical division of our master clock."
© Screenshot/Quote: Moogsynthesizers (YouTube)
The Character Knob: Sculpting the Feedback Path
"By default it's set up to act as a DJ style filter whereas I turn it clockwise I get a high pass response and I turn it counter clockwise I get a low pass response."
© Screenshot/Quote: Moogsynthesizers (YouTube)
The Character knob is where the Diffusion Delay steps beyond standard fare, introducing a DJ-style filter into the feedback path. By default, turning the knob clockwise engages a high-pass filter, while counterclockwise brings in a low-pass response. Because this filter sits in the feedback loop, each repeat becomes progressively more filtered, either losing top end or low end depending on the setting.
The video demonstrates both extremes: low-pass filtering removes brightness from the repeats, while high-pass filtering gradually thins out the bass, yielding a tape-like decay. This feature is particularly effective for shaping the atmosphere of a patch, allowing users to dial in anything from warm, analog-style echoes to crisp, airy delays that sit neatly in a mix.
Expanding Muse’s Sonic Palette: Final Thoughts
In summary, the Diffusion Delay is presented as a flexible and musically rich processor that significantly broadens what Muse can do. Its combination of stereo control, rhythmic precision, and tonal shaping makes it more than just a utilitarian effect—it’s a creative tool for building evolving soundscapes and adding depth to any patch.
The video closes by highlighting the Diffusion Delay’s ability to impart dimension and movement to Muse’s analog voices, making it a standout feature for those who want their synth lines to shimmer, bounce, and breathe. While some advanced features are reserved for deeper menu dives, the panel controls alone offer a wealth of possibilities for both live performance and studio exploration.
This article is also available in German. Read it here: https://synthmagazin.at/moog-music-muse-diffusion-delay-raeumliche-tricks-und-klangtexturen-im-fokus/
Watch on YouTube:
Latest articles
Watch on YouTube:
Visit the channel:
https://www.youtube.com/MoogSynthesizers
https://www.youtube.com/MoogSynthesizers
Links from MoogSynthesizers:
website: https://moogmusic.com
instagram: https://instagram.com/moogsynthesizers
facebook: https://www.facebook.com/moogmusicinc
twitter: https://twitter.com/moogmusicinc
Sponsored links:
If you purchase via these links, we may earn a small commission – at no extra cost to you. The link opens an Amazon keyword search, and results may vary depending on availability.
Moog Muse
🔗 Check price on Amazon
🔗 Check price on Amazon