Ever wondered how cinematic industrial chaos actually gets whipped up on stage? Metamyther, known for three-movement industrial epics, drags us through the underbelly of modular performance with a no-nonsense rig breakdown. Forget modular mystique—this is cables, cases, and real-world hacks for getting your synths to behave live (or at least pretend to). If you want to know which modules survive a year of gigs and which ones get booted out like a dodgy DJ at closing time, this is your guide. And trust me, some tricks are better seen than written about—so don’t just read, go give the video a spin.
9. June 2026
JET
Metamyther’s Modular Mayhem: Live Rig Dissected and Deconstructed
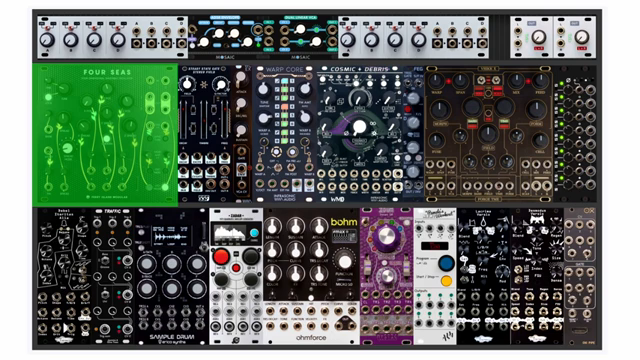
4C's Oscillator, Arturia Keystep, Bohm Kick, Cosmic Debris Reverb and Delay, Debil, Desmodus Reverb, Double Aliyah, Entumbra, FEG, iDumb, Lacrymaveriso, OXI, PAMs, Quadrat 1U, Sample Drum, Stereo Field, Traffic, VicX, Warp Core, Zadar, Zoom L6
From Berlin Chaos to Overhead Cam: How the Rig Evolved
Metamyther doesn’t tiptoe around the evolution of their modular rig—right from the start, we’re thrust into post-Berlin gig reality with a breakdown that’s as honest as a flat pint. The so-called support case hasn’t budged a millimetre since last year, holding down the boring but essential duties: a Keystep slinging MIDI to an OXI, and a Zoom L6 mixer/recorder keeping everything glued together. If you thought the glamour started there, think again.
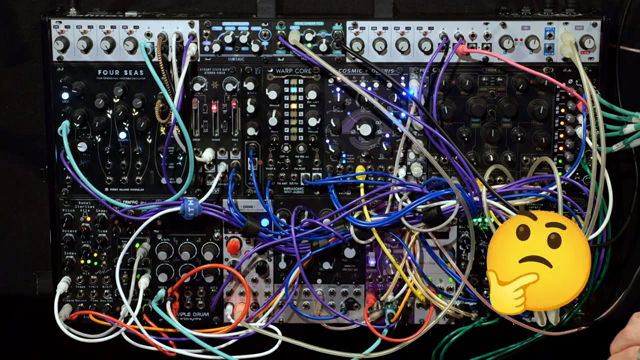
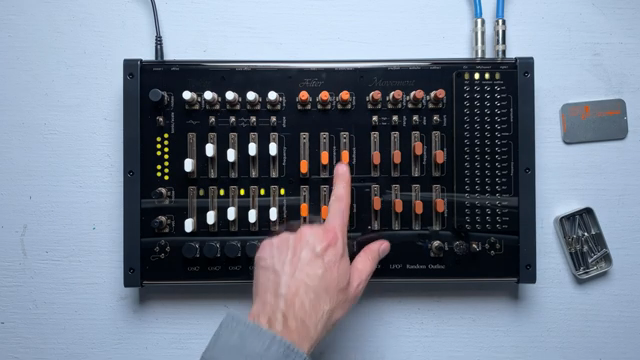
What’s properly interesting is the modular case itself—a groovebox on steroids, not some wobbly science fair project. The approach is dead simple, prioritising what actually gets played and battered live. The 4C’s oscillator nabs the penthouse spot, while the all-important outputs get tucked away in the top right, leaving precious real estate for modules that need a proper thrashing. It’s a hierarchy where the bottom row is the synth equivalent of being sent to the bar toilets: necessary, but you don’t want to linger.
"There's like a hierarchy here, is what I'm saying, where the top right is the second most sought after spot."
© Screenshot/Quote: Metamyther (YouTube)
Patch Smarter, Not Harder: Strategic Module Placement
"So when you're preparing your case, think about your most used modules and relegating them to the corners where you'll have the easiest access."
© Screenshot/Quote: Metamyther (YouTube)
There’s a method to this patching madness, and Metamyther’s got it nailed. Modules that demand constant fiddling get corners and top spots—think 4C’s, Debil, and VicX—while the likes of Bohm Kick, which mostly sit tight, get banished to the bottom. That’s not just ergonomics, it’s survival for your wrists and sanity mid-show.
Patching is all about fail-safes and keeping your hands off delicate controls. Quadrat 1U steps in as the guardian of the bank knob, so you don’t accidentally ruin a finely tuned interval. Outputs from the 4C’s get routed for maximum control, stereo field modules add envelope and filter drama, and the Zadar injects movement so nothing stays static (certainly not the sound). Drum triggers, meanwhile, get routed through the iDumb for delicious ratcheting, while Sample Drum handles anything from snares to mangled hi-hats. It’s a patching system built for chaos—but with enough guardrails to keep the train on the tracks.
Pre-Programming: The Punk Way to Control
Metamyther’s not here for endless knob-twiddling jams—this set ran tight because every sequence was pre-programmed. Three sequencers run the melodic voices, a fourth drives the drums, and patterns are arranged for a linear, no-faff performance. Colour coding means you know which bit’s busy and which is sparse, and there’s still just enough space left for a cheeky solo if the mood hits. It’s not about killing spontaneity; it’s about stopping your whole set sounding like a blown speaker in a tumble dryer.
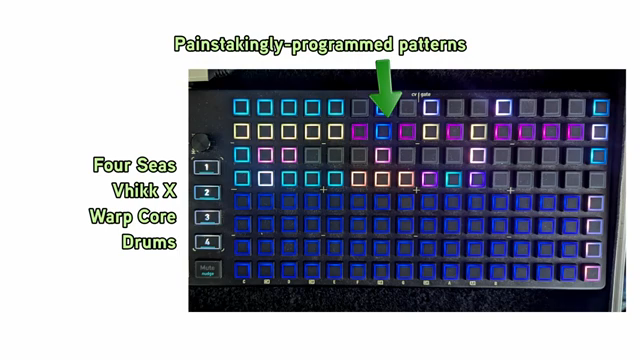
"I would set up bass and lead patterns that worked with each other, and then all I would need to do was trigger that row and know they were in line with each other."
© Screenshot/Quote: Metamyther (YouTube)
Last Year’s Gear vs. This Year’s: A Proper Punch-Up
"It's very much like a football coach who is trying to figure out which players to send out."
© Screenshot/Quote: Metamyther (YouTube)
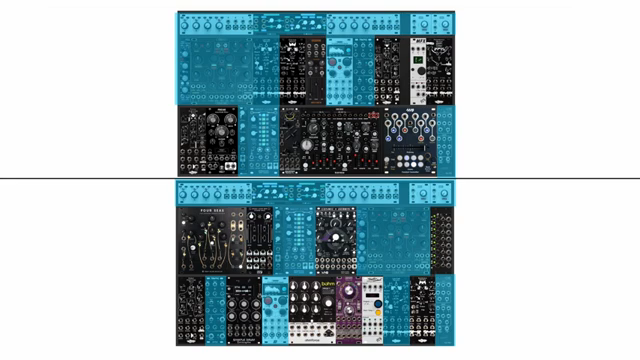
If you think modular rigs are static, you’ve never seen Metamyther’s approach—nothing’s perma-patched and the setup changes before you can finish your pint. Both last year and this year’s cases are packed to the gills with 24 modules, but only about half survive the yearly cull. Choosing modules is like picking your football team: old reliables in blue, new signings tested under fire. The deadline of a gig is brutal, but it’s the best way to actually learn what these things do.
Some modules stick around, others get swapped or upgraded. The Bohm Kick replaced a clunky DASPROM/polydactyl combo, freeing up space for more mischief. The VicX still pairs with the Lacrymaveriso, while the introduction of Entumbra means outputs are finally wrangled without fear of cable carnage. Even the multi-effects module got the boot for being too much menu-diving and not enough fun. If you want to know which modules survived and which got tossed, you’ll just have to watch—because the true sound of this evolving monster can’t be captured on paper.
Picking Modules for Industrial Mayhem
Metamyther’s creative process is gloriously unprecious: pick what works, experiment with the B-team, and let the looming threat of a live show force you to get good—fast. Sometimes the best results come from modules you barely understand, and the only rule is to keep it moving. If you want to get inspired, watch how these modules are wrangled into cinematic industrial mayhem—some things just have to be heard to be believed.
This article is also available in German. Read it here: https://synthmagazin.at/metamythers-modular-chaos-live-rig-seziert-und-zerlegt/
More articles about these products:
 David Hilowitz Music Illuminates the Cyma Forma ALT: A Crystal Soundscape
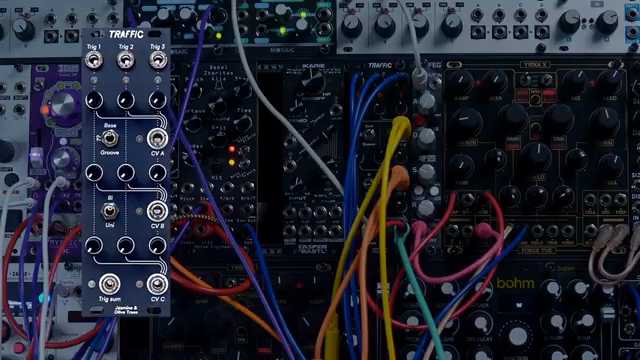 Metamyther’s Modular Mayhem: Traffic & Vic-X Take the Fast Lane
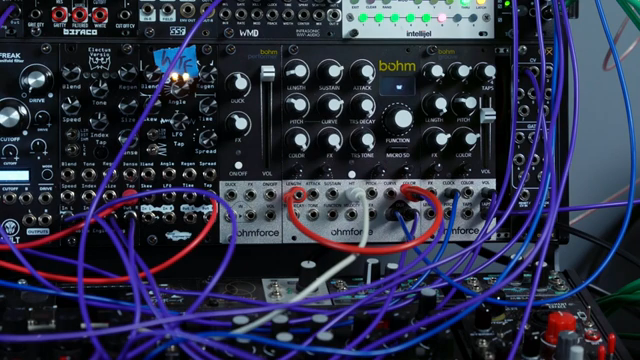 Metamyther Unleashes Bohm Kick Drum HPN Mode: A Wild Patch Rodeo
 Captain Pikant Breaks Down Gorillaz’s Drum Magic – No Ivy League Needed
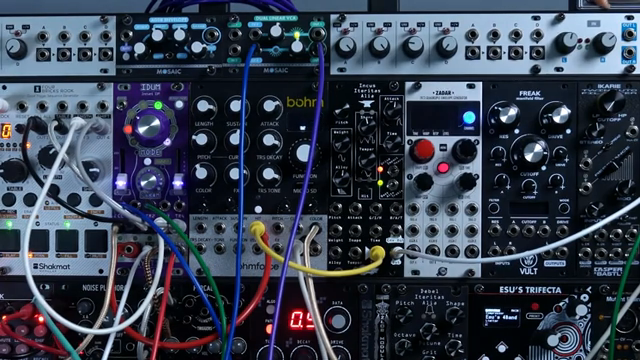 Metamyther Unleashes Industrial Mayhem: Four Bricks Rook vs Mystic Circuits IDUM
 The Midlife Synthesist Unleashes Double 0-Coast: Small Box, Massive Vibes
 Metamyther’s Modular Mindset: From Endless Jams to Finished Bangers
 Captain Pikant Spins the Drum Machine Mystery: Dissecting ‘You Spin Me Round’
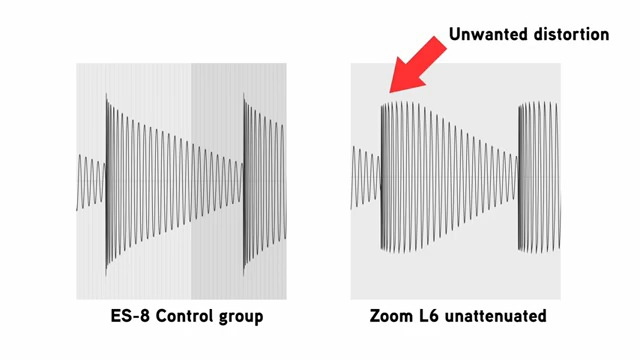 Metamyther vs. Zoom L6: Modular Mayhem and Mixer Mysteries
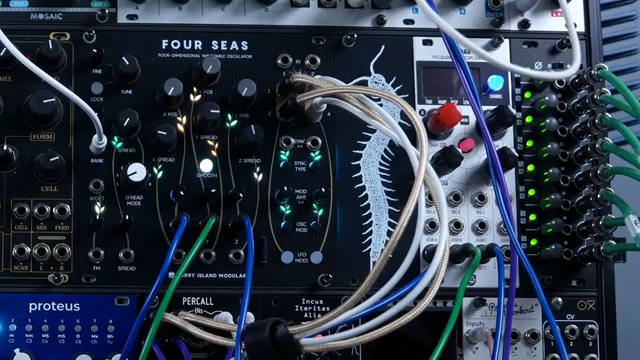 Metamyther Unleashes the Four Seas: Wavetable Mayhem from Ferry Island Modular
 Captain Pikant Dismantles Blue Monday: Drum Machine Mayhem and DMX Wizardry
 CaptainPikant Gets Nasty with Nine Inch Nails Beats
Watch on YouTube:
Latest articles
Watch on YouTube:
Visit the channel:
https://www.youtube.com/Metamyther
https://www.youtube.com/Metamyther
Links from Metamyther:
Main Site: https://metamyther.com
Instagram: https://instagram.com/metamyther
Bandcamp: https://metamyther.bandcamp.com
Facebook: https://facebook.com/tkexit
Sponsored links:
If you purchase via these links, we may earn a small commission – at no extra cost to you. The link opens an Amazon keyword search, and results may vary depending on availability.
4C's Oscillator
🔗 Check price on Amazon
🔗 Check price on Amazon
Arturia Keystep
🔗 Check price on Amazon
🔗 Check price on Amazon
Bohm Kick
🔗 Check price on Amazon
🔗 Check price on Amazon
Cosmic Debris Reverb and Delay
🔗 Check price on Amazon
🔗 Check price on Amazon
Debil
🔗 Check price on Amazon
🔗 Check price on Amazon
Desmodus Reverb
🔗 Check price on Amazon
🔗 Check price on Amazon
Double Aliyah
🔗 Check price on Amazon
🔗 Check price on Amazon
Entumbra
🔗 Check price on Amazon
🔗 Check price on Amazon
iDumb
🔗 Check price on Amazon
🔗 Check price on Amazon
Lacrymaveriso
🔗 Check price on Amazon
🔗 Check price on Amazon
PAMs
🔗 Check price on Amazon
🔗 Check price on Amazon
Quadrat 1U
🔗 Check price on Amazon
🔗 Check price on Amazon
Sample Drum
🔗 Check price on Amazon
🔗 Check price on Amazon
Stereo Field
🔗 Check price on Amazon
🔗 Check price on Amazon
Traffic
🔗 Check price on Amazon
🔗 Check price on Amazon
VicX
🔗 Check price on Amazon
🔗 Check price on Amazon
Warp Core
🔗 Check price on Amazon
🔗 Check price on Amazon
Zadar
🔗 Check price on Amazon
🔗 Check price on Amazon
Zoom L6
🔗 Check price on Amazon
🔗 Check price on Amazon